Set Up Clash Verge on Windows
Clash-verge is a cross-platform proxy tool for Windows and Mac devices that can help you protect your personal privacy and bypass regional restrictions when browsing the web. Here are the detailed steps for using Clash-verge.
Step 1: Download Clash-verge
First, download and install the software from the link below.
Step 2: After installation, open the application and configure the node subscription
1. On the main panel of Clash-verge, click on Profiles on the left side, and then click on New on the right side.
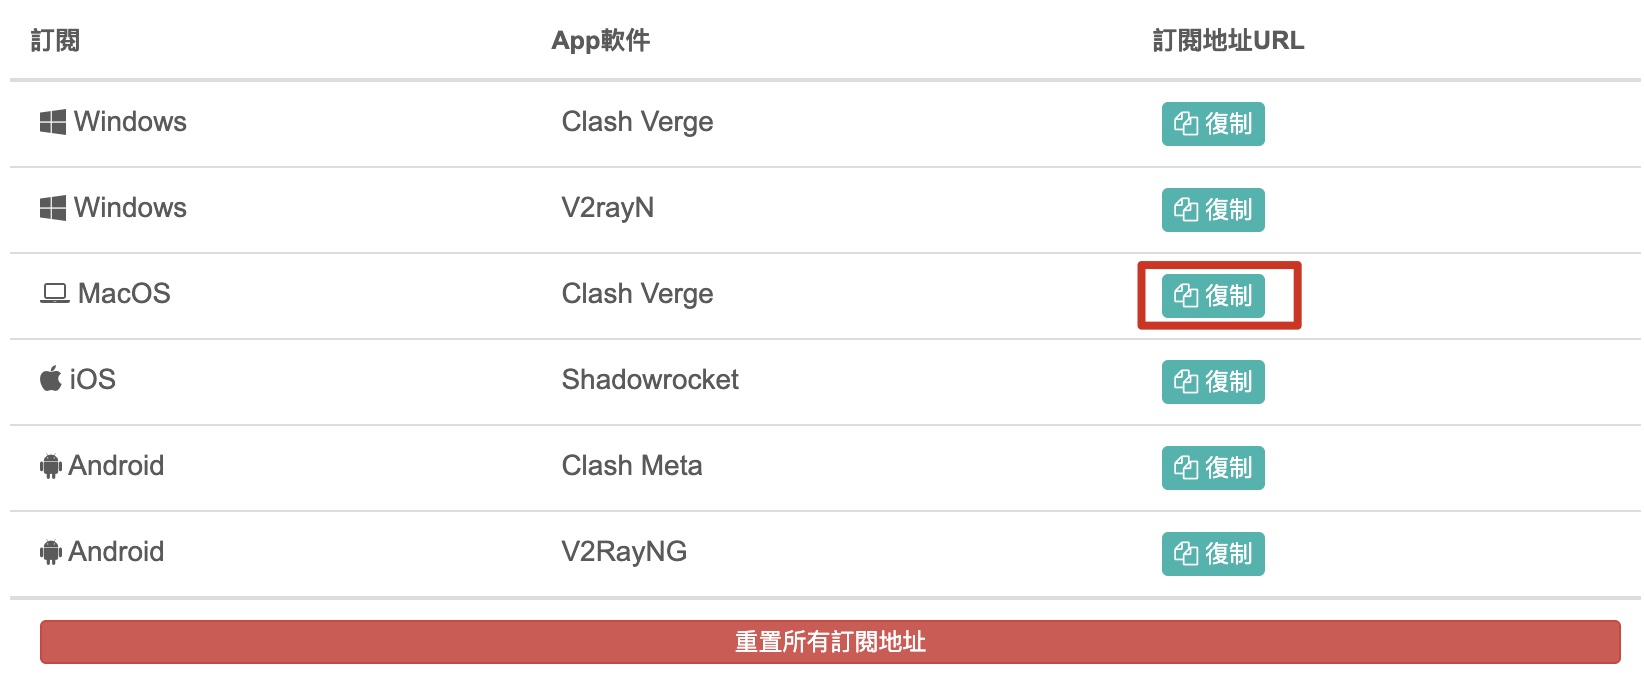
2. Open our official website and log in, go to the service details page, find the subscription address for Clash-verge, and click to copy it;
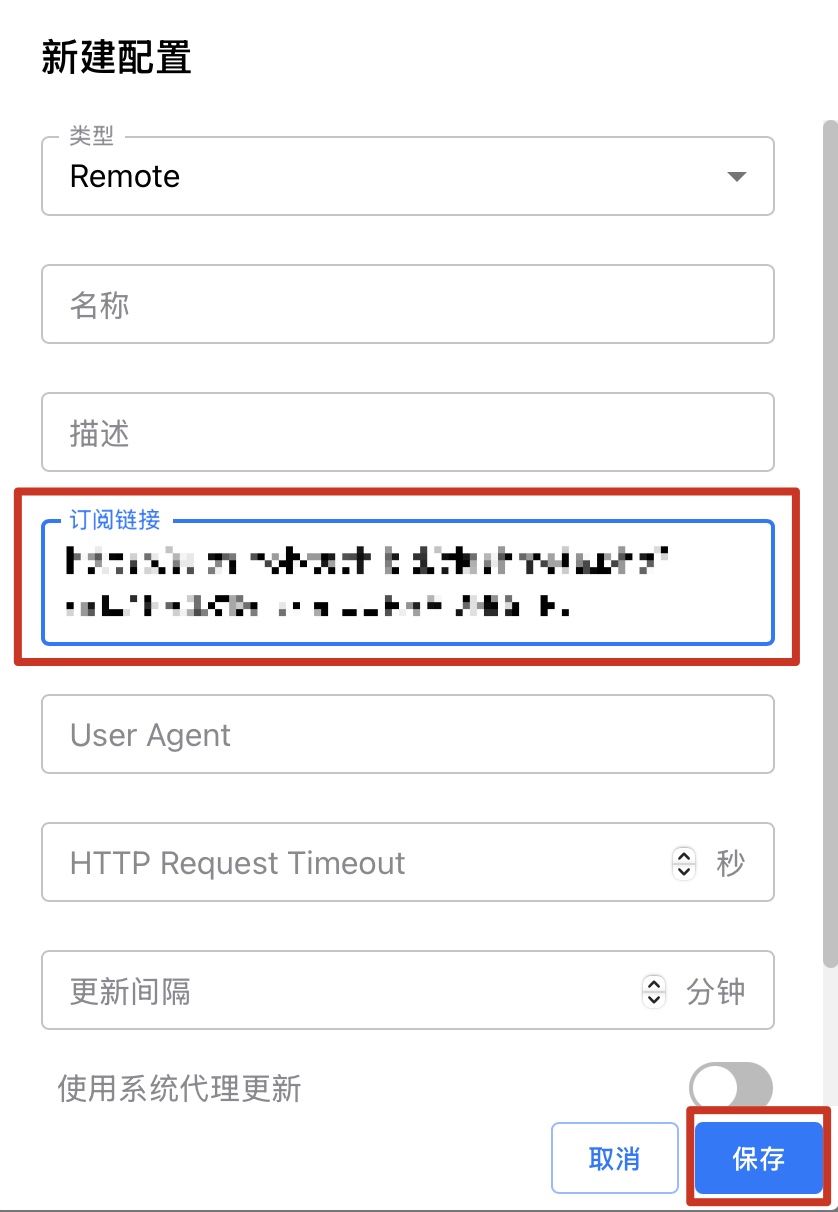
4. Return to the Create Profile interface in Clash-verge, paste the copied URL into the Subscription URL field, and click SAVE.
5. At this point, the subscription address has been added. You can click the refresh button to update to the latest configuration, and you need to click to select the Profile to be used, so that the icon turns blue.
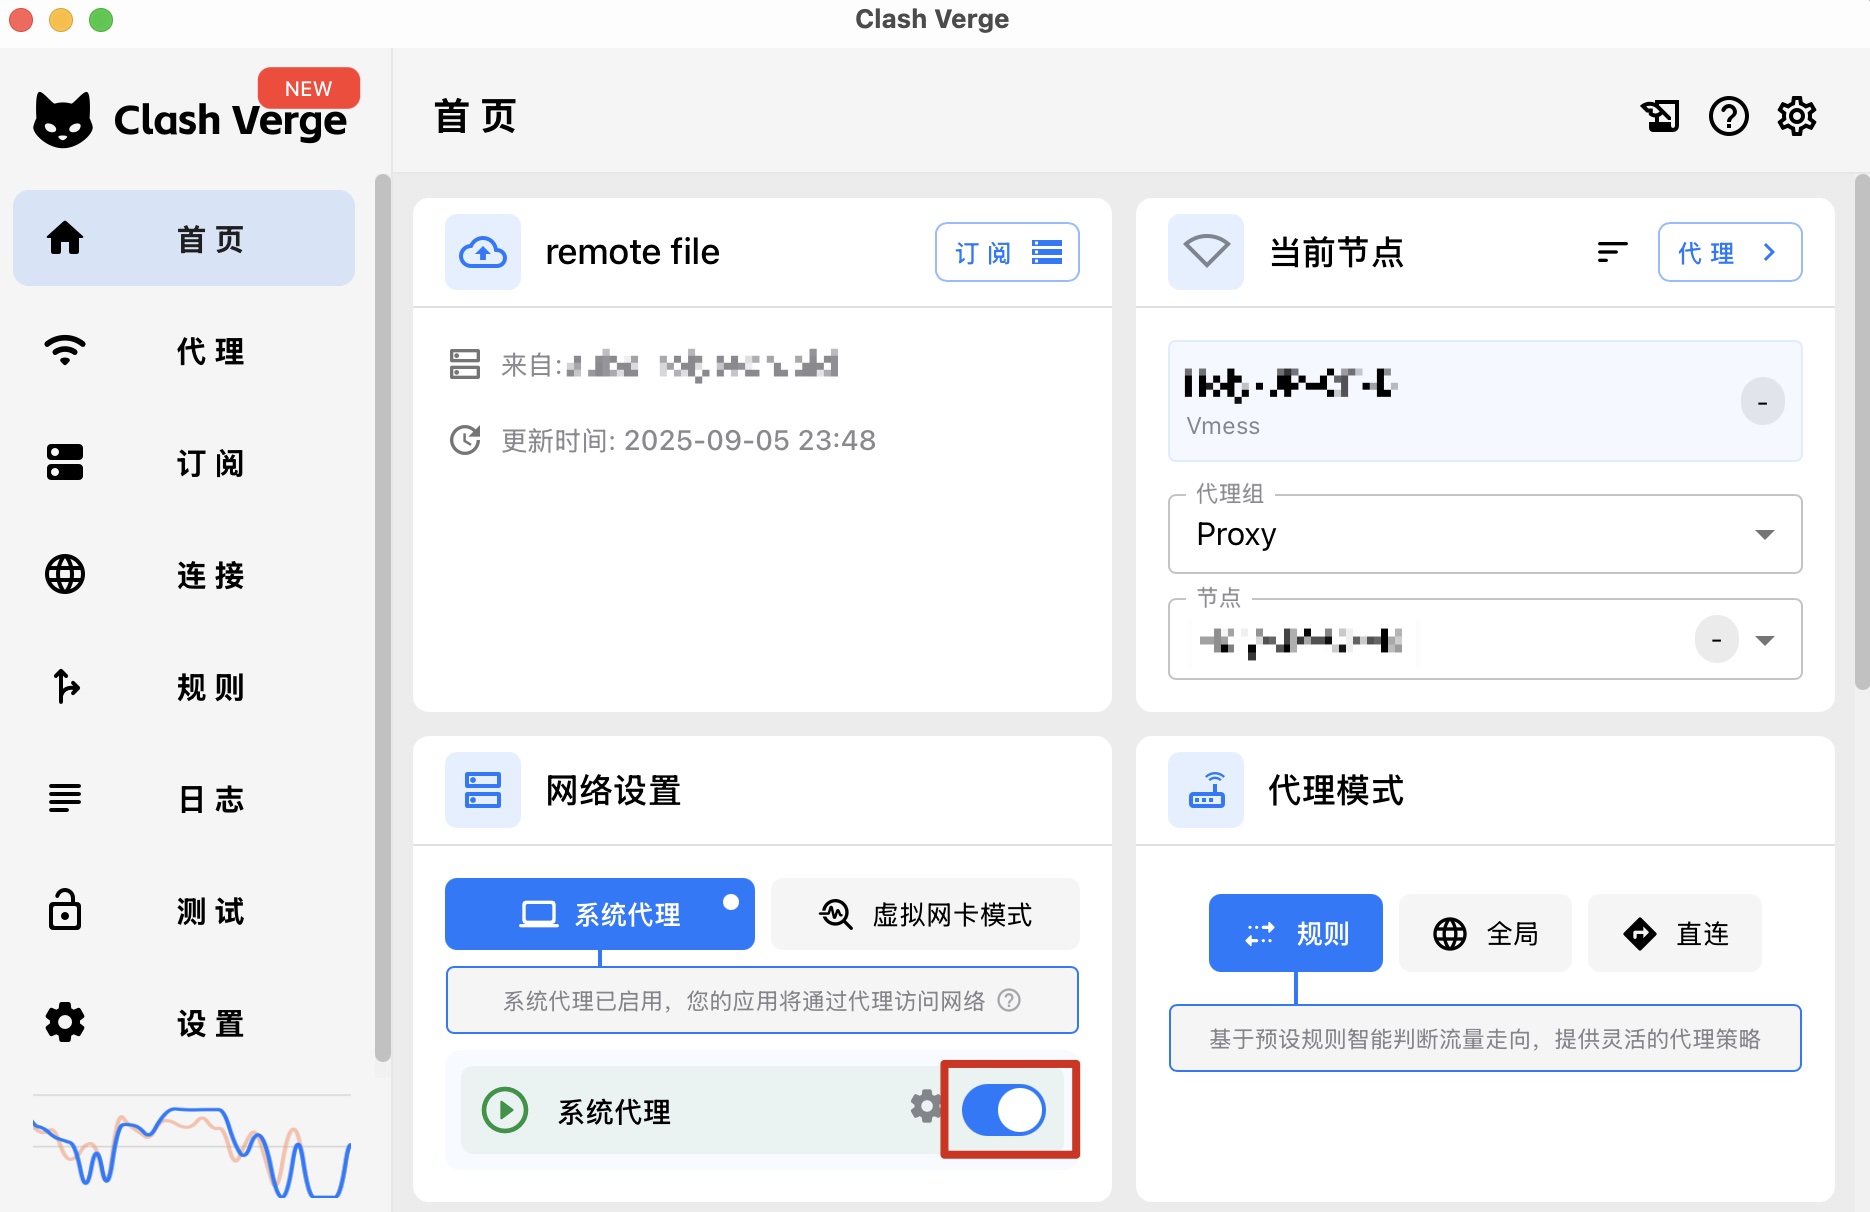
6. On the left side, select Home. Under Network Settings - System Proxy, you can slide to turn the proxy on and off. This is the switch for the proxy.
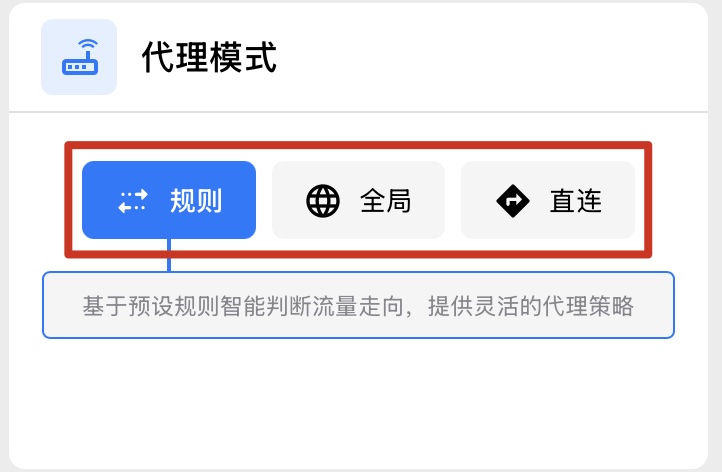
On the right side, the Proxy Mode can be switched between "Rule", "Global", and "Direct" at any time.
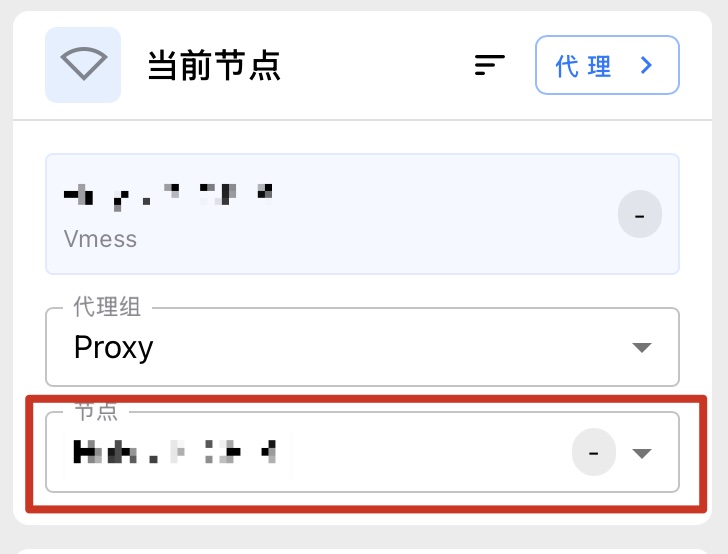
On the right side, the Current Node can be switched at any time.
Now, you have successfully configured Clash-verge and can start using it.
If you encounter any problems with configuring the subscription, please feel free to contact us via a support ticket.
We hope this Clash-verge tutorial is helpful to you!

