Set Up HolyTech on Windows
Welcome to HolyTech. This guide will assist you with client installation, account login, node configuration, and proxy activation on Windows, helping you set up and start using the service quickly.
1. Install the HolyTech Client
- Click here to download the HolyTech client installation package for Windows.
- Once the download is complete, double-click to open the installation file (
.exe).- Follow the installation wizard instructions to complete the setup, and it is recommended to check "Create desktop shortcut".
- Locate the HolyTech icon on your desktop or Start Menu and launch it.
First-time Launch Tip
Due to the security protection mechanism of Windows SmartScreen, a defense prompt may appear when opening the app for the first time. If the system blocks the launch, click "More info" in the prompt window, and then click "Run anyway" to grant authorization.
2. Log in to Your HolyTech Account
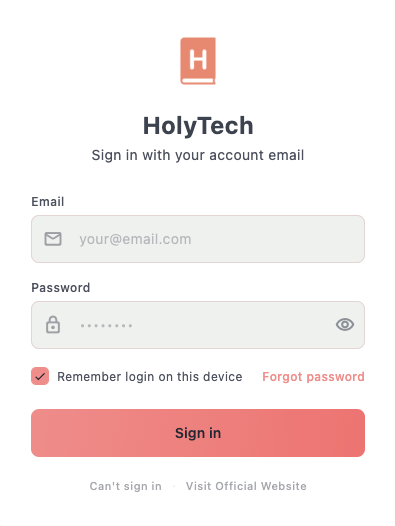
After launching the client, the login page will be displayed.
- Enter the email address you used during registration.
- Enter your account password.
- Click the "Log In" button to enter the main interface.
Once your account information is successfully verified, the system will automatically sync your plan details and node data.Login interface not displaying correctly or insufficient permissions?
In a few Windows environments, system security restrictions may cause the login page to appear blank, fail to load, or fail to save settings. Please try the following method:
- Completely exit the HolyTech program.
- Right-click on the HolyTech desktop shortcut icon.
- Select "Run as administrator".
- Click "Yes" in the User Account Control (UAC) prompt that appears.
- Once reopened, you should be able to log in and configure settings normally.
3. Select a Node and Connect
After logging in successfully, it is recommended to select an available route first:
- Click to enter the "Node List" from the home screen.
- Select your desired node or region.
- Return to the main screen.
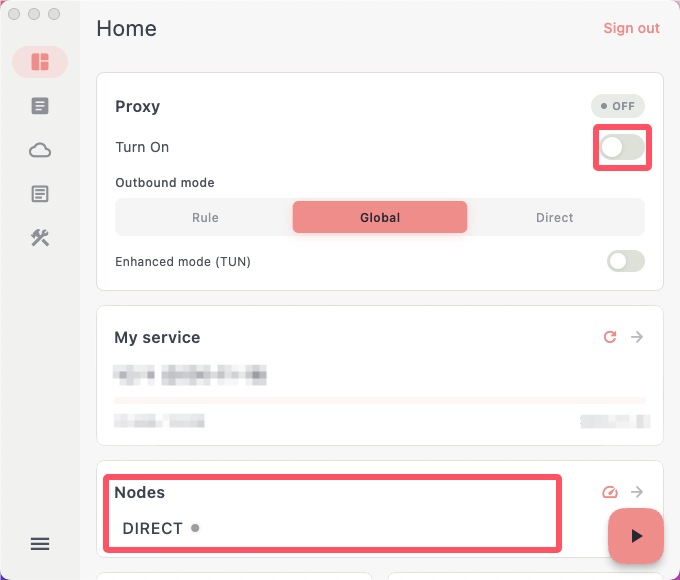
- Turn on the "Proxy Switch" in the upper right corner.
When the connection status shows "Connected", it indicates that the proxy service has been successfully enabled.
4. Sync the Latest Node Information
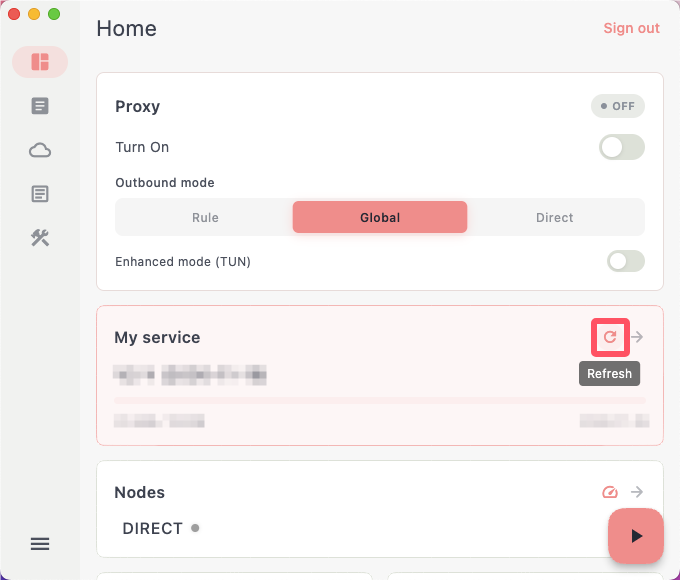
If you have just completed a purchase, renewed your subscription, or if there is a service update, it is recommended to sync the latest data first.
Click the "Refresh Nodes" button on the home screen to fetch the latest configuration.
5. Rule Mode and Routing Rules
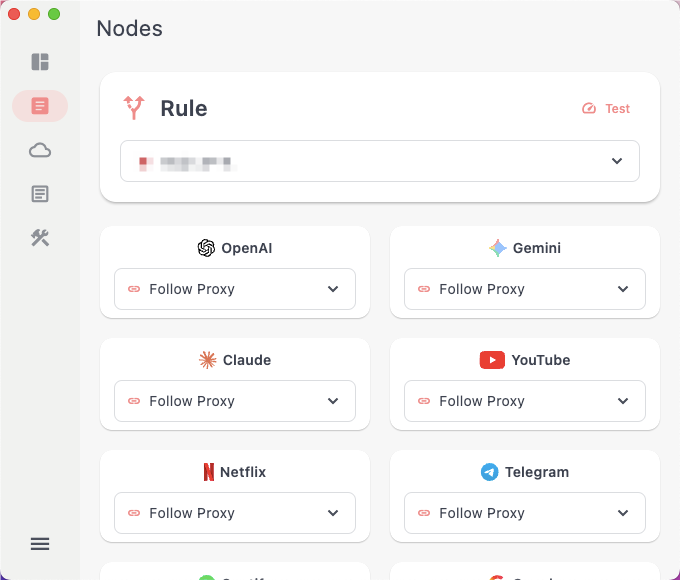
HolyTech provides a smart routing function that allows you to specify dedicated nodes for different platforms, improving network stability and user experience.
- Go to the "Rule Configuration" page.
- Select the service platform you want to configure (e.g., OpenAI, Netflix).
- Assign the corresponding node.
- Save settings.
Quick Tip: It is recommended to use US nodes for AI services. For streaming services, you can choose routes such as Hong Kong, Japan, or Singapore for lower latency based on your location.
6. Download Older Clients (Optional)
If you prefer to use an older interface or need compatibility with specific system versions, you can download the following dedicated versions:
- Windows 64-bit : Download HolyTech v1.5.0 (64-bit)
- Windows 32-bit : Download HolyTech v1.5.0 (32-bit)
If your operating system is Windows 7 or older, please download the special compatibility version:
- Windows 7 Dedicated Compatibility Version (64-bit)
- Windows 7 Dedicated Compatibility Version (32-bit)
Frequently Asked Questions (FAQ)
Q1: What should I do if no nodes are displayed after logging in?
Please first verify on the website that your subscription is active, then go to the home screen and click My Services → Refresh. If they still do not display, please log out and log back into the client.
Q2: The proxy is turned on but I cannot access the internet?
Please try the following steps:
- Switch to another node to test.
- Turn the proxy switch off and re-enable it.
- Restart the HolyTech client.
- Confirm that your local firewall or security software is not blocking HolyTech.
Q3: My data limit didn't increase after updating my subscription?
Please click "Refresh" on the home screen to sync the latest subscription information. If necessary, log out and log back into your account.
Q4: A Windows security prompt appears during startup?
This is a standard Windows security mechanism. Once you confirm the program source is correct, simply click "Yes" to proceed.
Q5: Can Windows 7 be used?
Yes, but please make sure to download the Windows 7 compatibility version. The latest client versions might not function properly on older systems.
Q6: Switching nodes doesn't take effect immediately?
It is recommended to turn off the proxy and turn it back on, or restart the client to ensure the new node settings are applied.